Quicktime want to
make you pay for updates:
1. Open Quicktime in
Start > Programs > Quicktime
2. Click Edit >
Preferences > Quicktime Preferences
3. Click [File
Types] Tab and Uncheck MP3
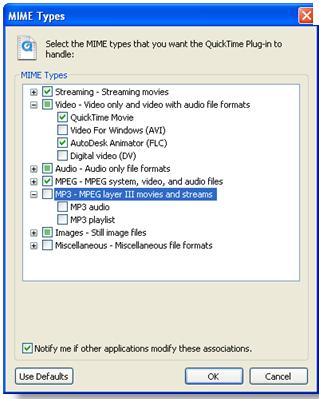
4. Click
[Browser] Tab
5. Click MIME Settings,
and Uncheck MP3
6. Click OK
Twice
(PS SOMETIMES THE
OPTIONS ARE GREYED OUT, BECAUSE QUICKTIME WANT YOU TO PAY
AND UPGRADE
so you need to use one
of the other methods)

---------------------------------------------------------------------------------------
FOR MAC USERS see below
or click
here
FOR FIREFOX:
In firefox, select the
Tools menu >> Add-ons >> click the
"uninstall" next to Quicktime.
This is not
uninstalling Quicktime from your computer instead,
uninstalling the Firefox add on.
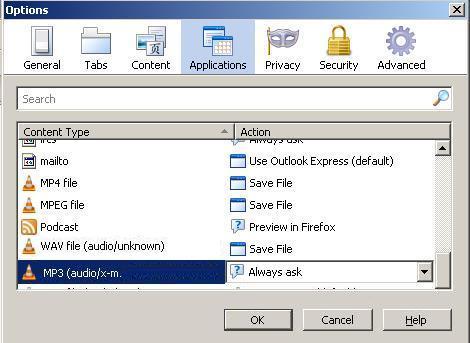
Or choose always ask:
Tools, Options:
----------------------------------------------------------------------------------
---------------------------------------------------------------------------------------------
you can also try using
W.Media Player as your default:
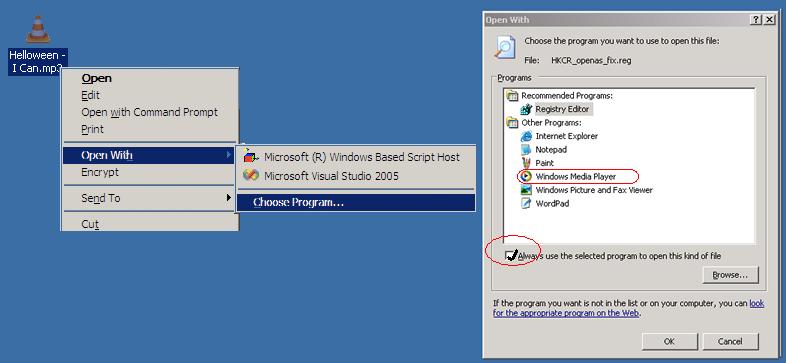
1. right click on an
mp3 from your PC and select "open with"
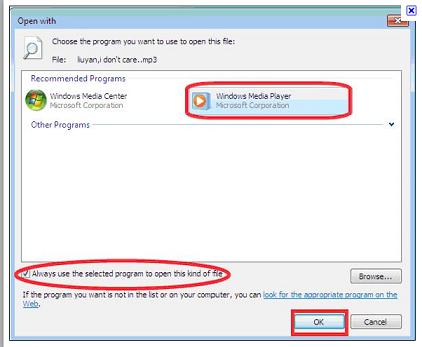
2. look for the Windows
Media Player from the list and click
2. click the button
"always use this program" OK
-------------------------------------------------------------------------------------------
DISABLE QUICKTIME IN
CHROME BROWSER:
Open chrome
go to
chrome://plugins/
Disable the quicktime
ones (there should , 7 of them)
---------------------------------------------------------------------------------------------------------
some more help:
https://ask-leo.com/
https://insomniacgeek.com/
---------------------------------------------------
MAC
USERS:
Select "New Folder"
under "File" in the top menu bar of the Finder. Highlight
the folder name, "Untitled" and type a name,
such as "MP3 files," to
create a download folder.
Switch to your browser
window containing YOUR DOWNLOAD PAGE with the MP3 file(s)
and right-click the link for the desired music
file to open a drop
down menu of options. Alternatively, if you have a
one-button mouse or trackpad,
press and hold the
"Control" key (key with the Apple logo) and click the
mouse/trackpad button to activate a menu of
options.
Select "Save File As"
from the drop down menu and release the key and the
button to perform the option.
Select the MP3 folder
created in step 1 as the destination folder. Leave the
file name as-is (i.e., don't type a new file name)
and click the "Save"
button.
then add to
itunes:
1. Launch iTunes and
select "Add to Library" under "File" in your top menu
bar.
2. Select your MP3
file--located in the folder created in Step 1--and click
the "Add" button.
3. Click the "Yes"
button if a prompt is displayed, "Add this song to the
iTunes Library?"
4. Wait for iTunes to
convert and add the song to your iTunes Music
Library.
5. Repeat Steps 1 to 3
for each MP3 file.